Google Vision API 사용법
[UMC 3기] Vibecap
사용자로부터 전달받은 이미지로부터 키워드를 추출하기 위해 google vision api를 사용한다.
개요
Integrates Google Vision features, including image labeling, face, logo, and landmark detection, optical character recognition (OCR), and detection of explicit content, into applications.
서비스를 개발하기 전에 한 번 테스트 해보기로 했다.
1. access 권한 신청
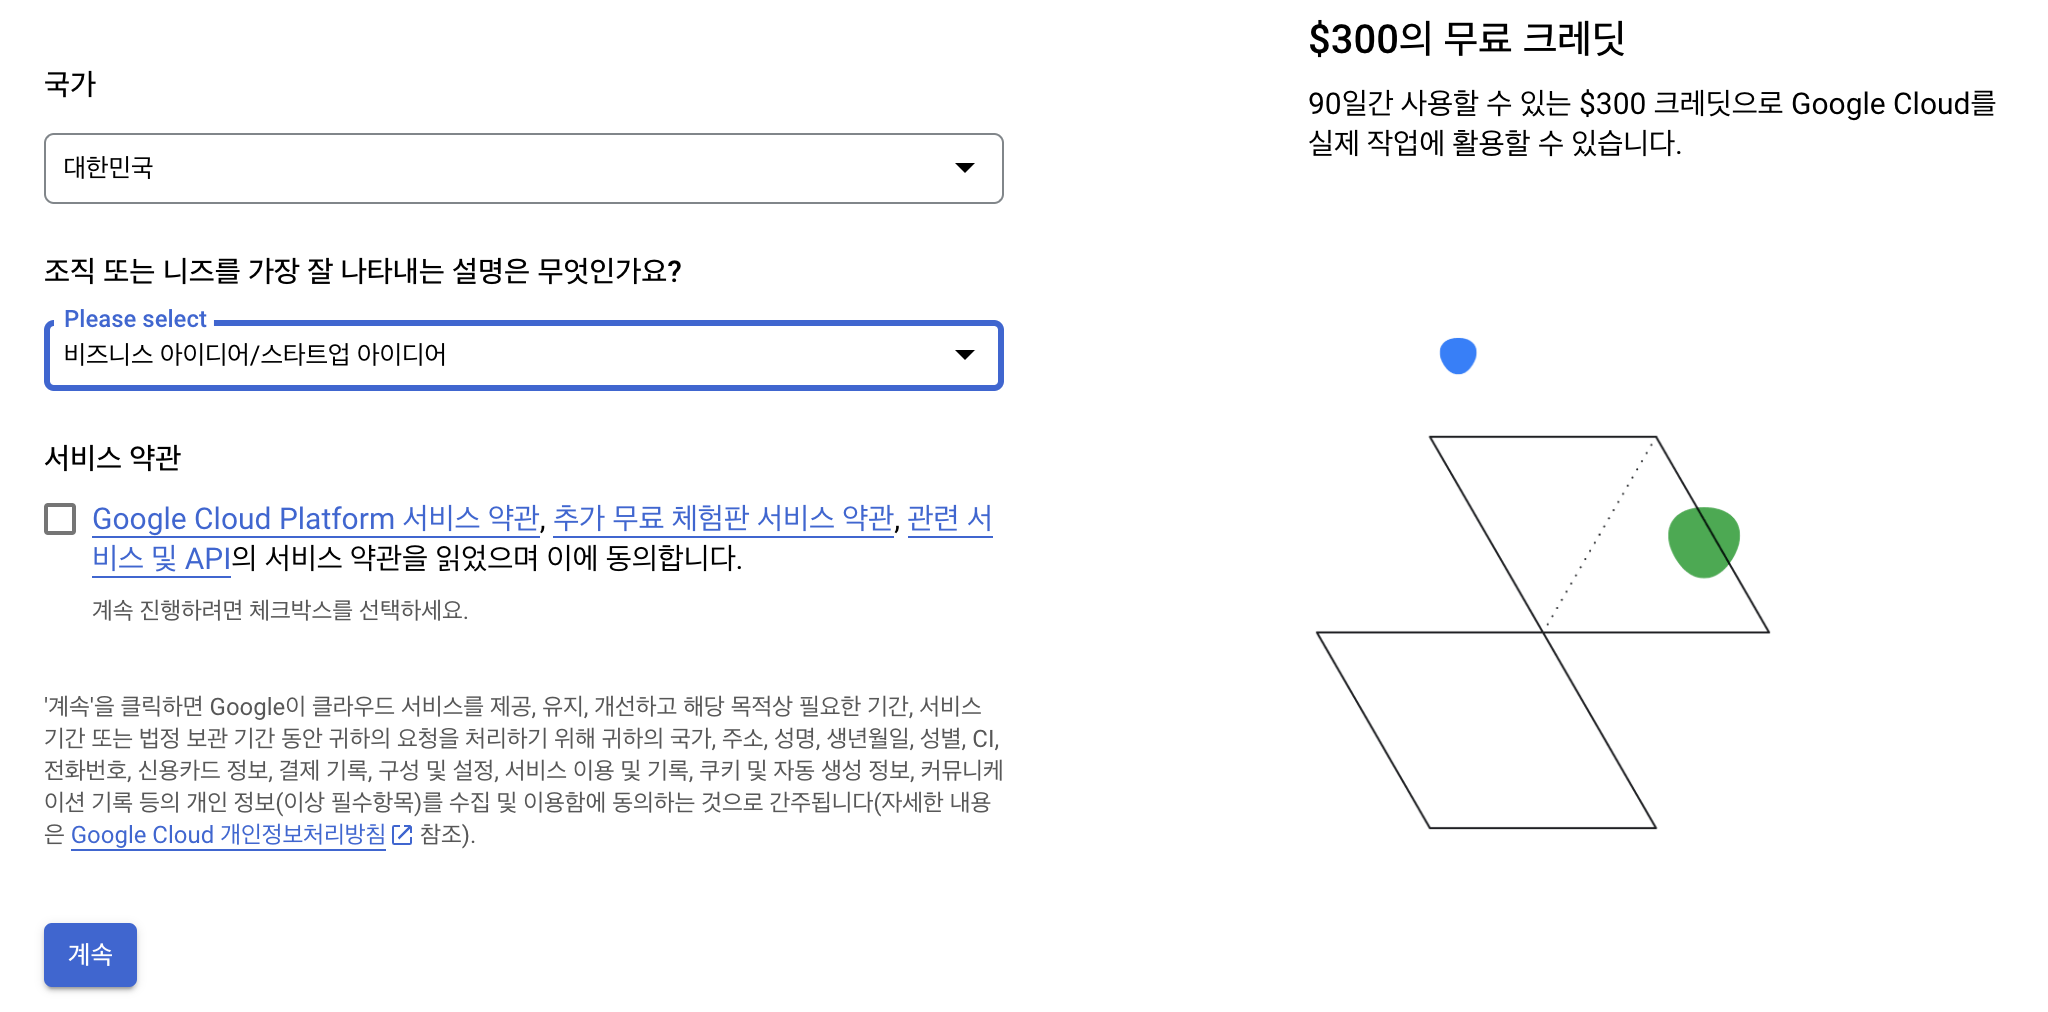
이후 결제 수단과 주소를 입력한다. 무료 체험판이 종료된다고 해서 요금이 부과되는 것은 아니라고 한다.
유료 계정으로 업그레이드 하지 않는 한 요금이 청구되지 않는다.
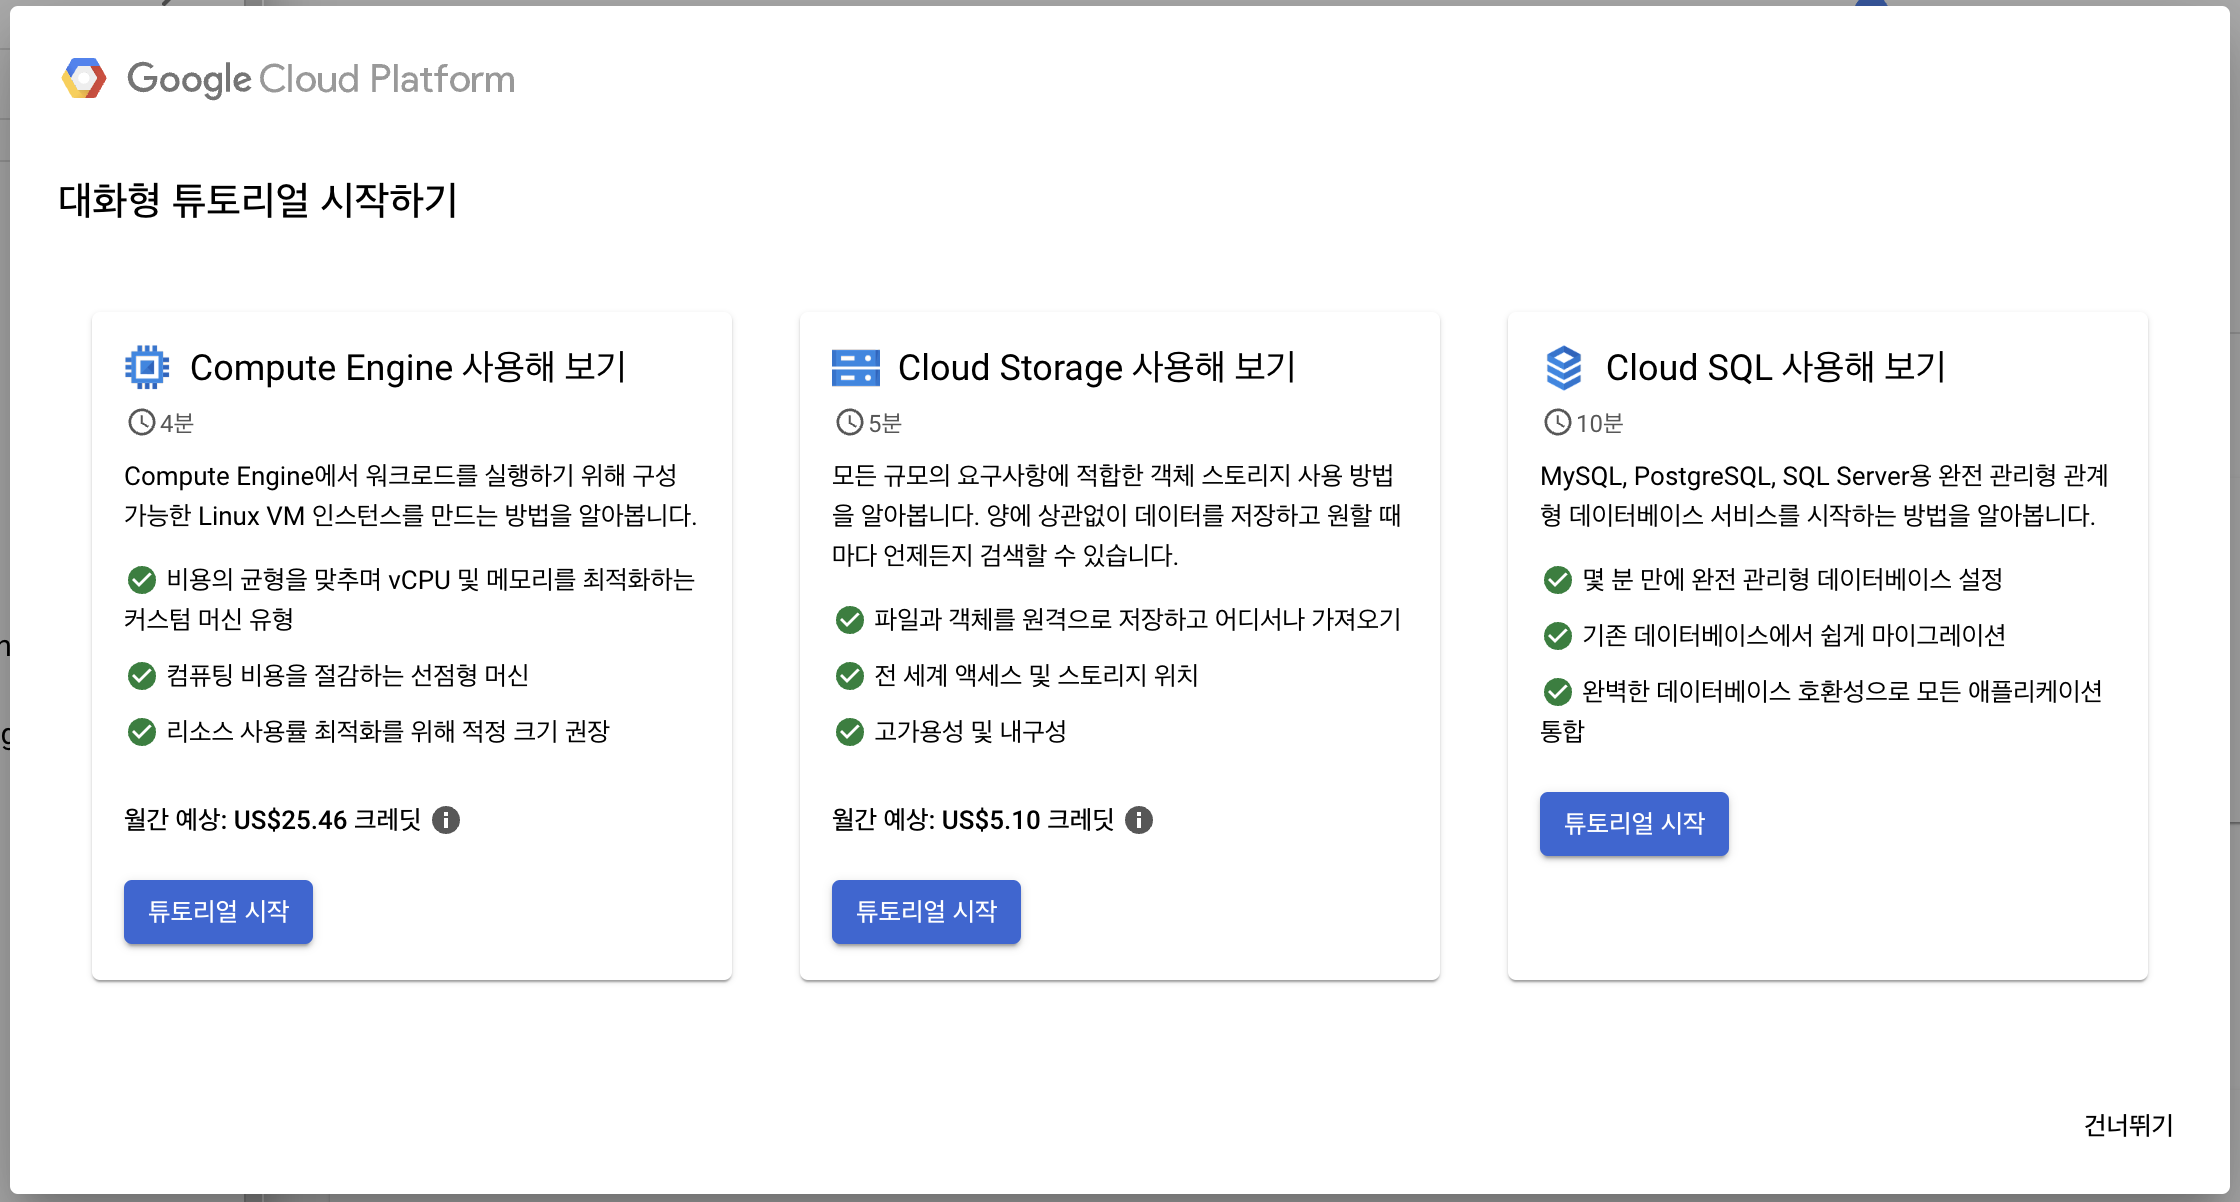
튜토리얼은 예상 요금이 표시되어 있어서 일단 건너뛰었다.
2. cloud vision api 활성화
Cloud Vision API 가이드가 시키는대로 하나씩 진행하면 된다.
$ export GOOGLE_APPLICATION_CREDENTIALS="/Users/mingeun/Vibecap/prototype01/credential/<다운받은 json 파일 이름>"
서비스 계정 키가 포함된 JSON 파일의 경로를 환경변수 GOOGLE_APPLICATION_CREDENTIALS에 저장.
앱에서 OAuth 동의 화면을 구현해야한다고 경고 메세지가 표시되어있다.
3. vision ai api 사용 설정
google cloud console에서 검색창에 google vision ai api를 검색한다.
사용 버튼 클릭.
vision api document를 보면 rest api 사용법을 알 수 있다.
4. client library
Client library를 사용하면 지원되는 언어로 Google Cloud API에 쉽게 접근할 수 있다.
사용자가 직접 request를 만들어 요청을 보내도 되지만 라이브러리를 사용하면 코드의 양을 크게 줄여준다.
내부적으로 google cloud와 통신하는 ImageAnnotatorClient 객체를 생성해 기능을 사용하고 close하는 방식이다.
Java 11 또는 Java 17이 적합하다.
dependency 추가
Gradle을 통해 dependency 항목을 추가한다.
dependencies{
	// 나머지 생략
	implementation platform('com.google.cloud:libraries-bom:26.1.5')
	implementation 'com.google.cloud:google-cloud-vision'
}
예제와 자세한 설명은 여기 클릭
5. Vision API 호출 코드
ImageAnnotatorClient 객체를 사용해 Google Cloud에 요청을 보내고 응답을 받는다.
spring boot의 RestTemplate과 사용방법이 비슷하다.
POST method를 통해 전달받은 파일을 서버 disk에 저장하는 방법
@Service
public class ImgService {

    // 이미지 파일이 저장될 디렉토리 경로 (자신의 로컬 환경에 맞게 수정해야함)
    private static String DIR_PATH =  "/Users/mingeun/Vibecap/prototype01/capturedImgs/";

    // 이미지 파일을 로컬에 저장
    public String saveFile(MultipartFile file) throws IOException, IllegalStateException {

        if (file.isEmpty())
            return null;

        String originalName = file.getOriginalFilename();                               // 파일 원래 이름
        String uuid = UUID.randomUUID().toString();                                     // 파일 식별자
        String extension = originalName.substring(originalName.lastIndexOf("."));   // 파일 확장자 추출
        String savedName = uuid + extension;                                            // 이미지 파일의 새로운 이름
        String savedPath = DIR_PATH + savedName;                                         // 파일 경로

        file.transferTo(new File(savedPath));                                           // local에 파일 저장

        return savedPath;
    }

    // 이미지 파일에 대한 키워드를 하나의 문자열로 반환
    public String extractKeywords(String imgFilePath) throws Exception {

        AtomicReference<String> labels = new AtomicReference<>("");

        try (ImageAnnotatorClient vision = ImageAnnotatorClient.create()) {

            // Reads the image file into memory
            Path path = Paths.get(imgFilePath);
            byte[] data = Files.readAllBytes(path);
            ByteString imgBytes = ByteString.copyFrom(data);

            // Builds the image annotation request
            List<AnnotateImageRequest> requests = new ArrayList<>();
            Image img = Image.newBuilder().setContent(imgBytes).build();
            Feature feat = Feature.newBuilder().setType(Feature.Type.LABEL_DETECTION).build();
            AnnotateImageRequest request =
                    AnnotateImageRequest.newBuilder()
                            .addFeatures(feat)
                            .setImage(img)
                            .build();
            requests.add(request);

            // Performs label detection on the image file
            BatchAnnotateImagesResponse response = vision.batchAnnotateImages(requests);
            List<AnnotateImageResponse> responses = response.getResponsesList();

            for (AnnotateImageResponse res : responses) {
                if (res.hasError()) {
                    System.out.format("[ERROR]: %s%n", res.getError().getMessage());
                    return null;
                }

                List<ImgDescription> keywords;
                for (EntityAnnotation annotation : res.getLabelAnnotationsList()) {
                    annotation
                            .getAllFields()
                            .forEach((k, v) -> {
//                                List<String> fieldNames = List.of(k.toString().split("."));
//                                System.out.format("%-16s : %s\n", fieldNames.get(fieldNames.size()), v.toString());
                                if (k.toString().contains("description")) {
                                    System.out.format("%s, ", v.toString());
                                    labels.set(labels + v.toString() + "\n");
                                }
                            });
                }
            }
        }

        return labels.toString();
    }
6. test
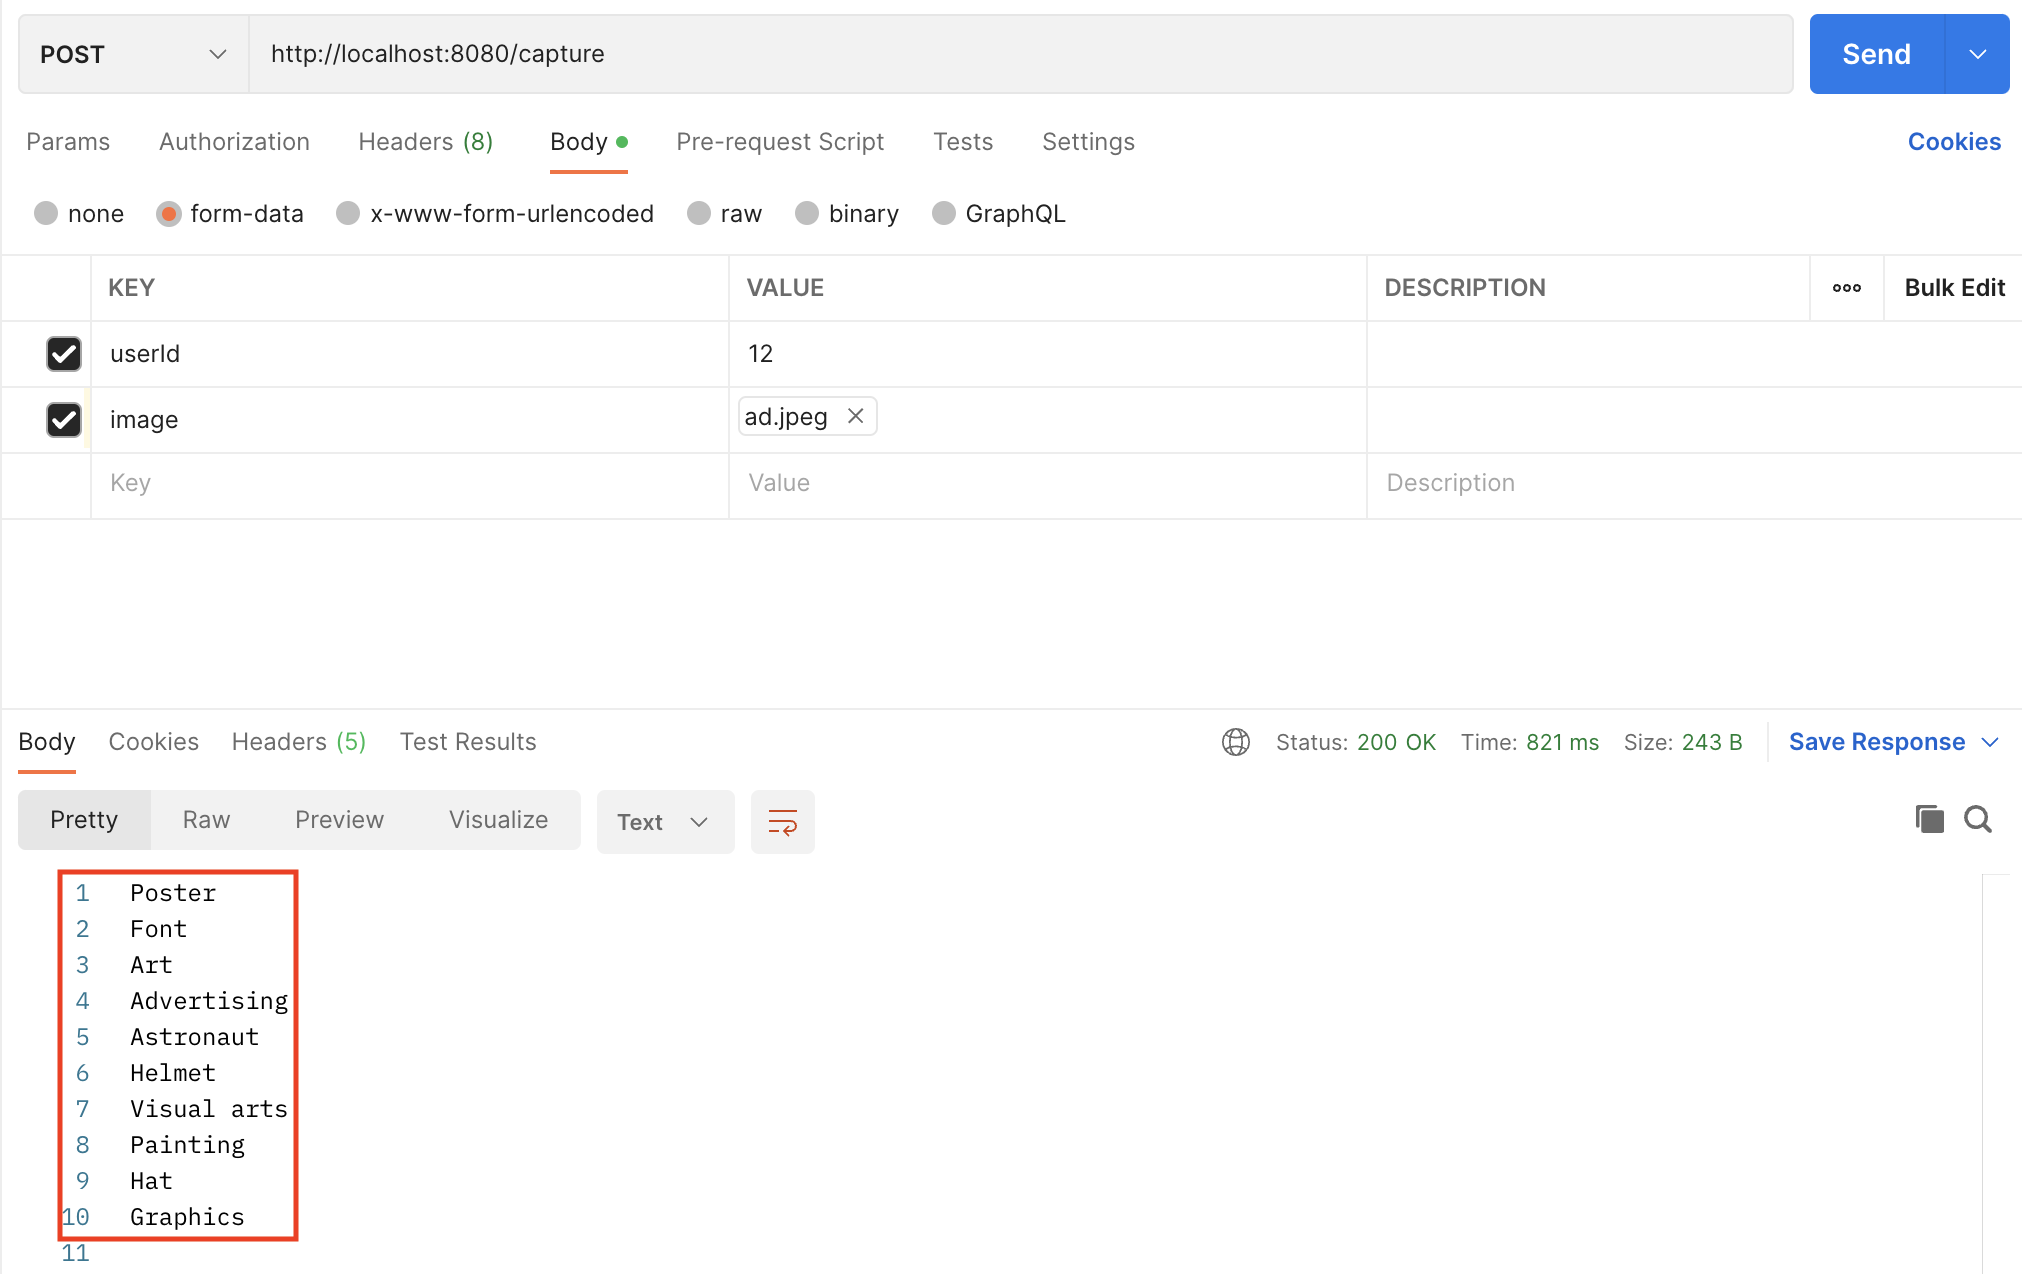
Postman을 이용한 API 호출 테스트
🚨 [ERROR] The Application Default Credentials are not available.
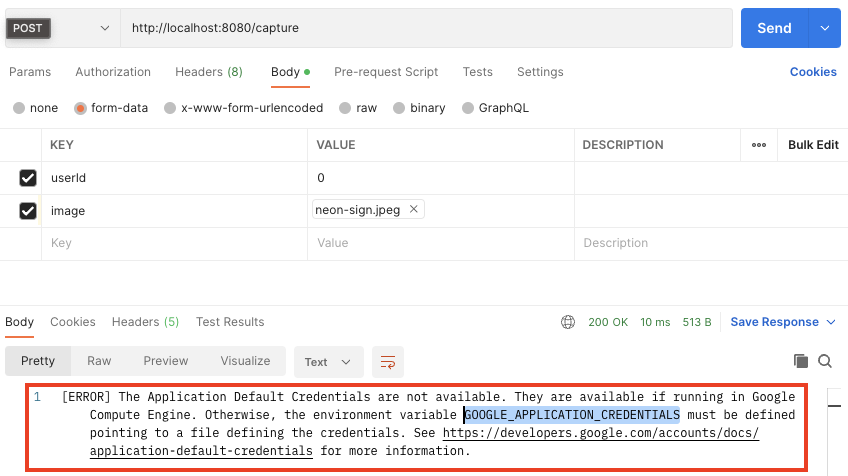
환경변수를 설정해주었는데도 에러가 발생했다.
환경변수가 아니라 ADC라는 것을 설정해줬어야 한다.
해결방법
에러 메세지에 포함된 링크에서 시키는 대로 ADC를 설정한다.
gcloud CLI설치google-cloud-sdk/bin을 환경 변수PATH에 등록$ ./google-cloud-sdk/install.sh$ gcloud init- 인증을 적용할 프로젝트 선택
$ gcloud auth application-default login
test01
request

response
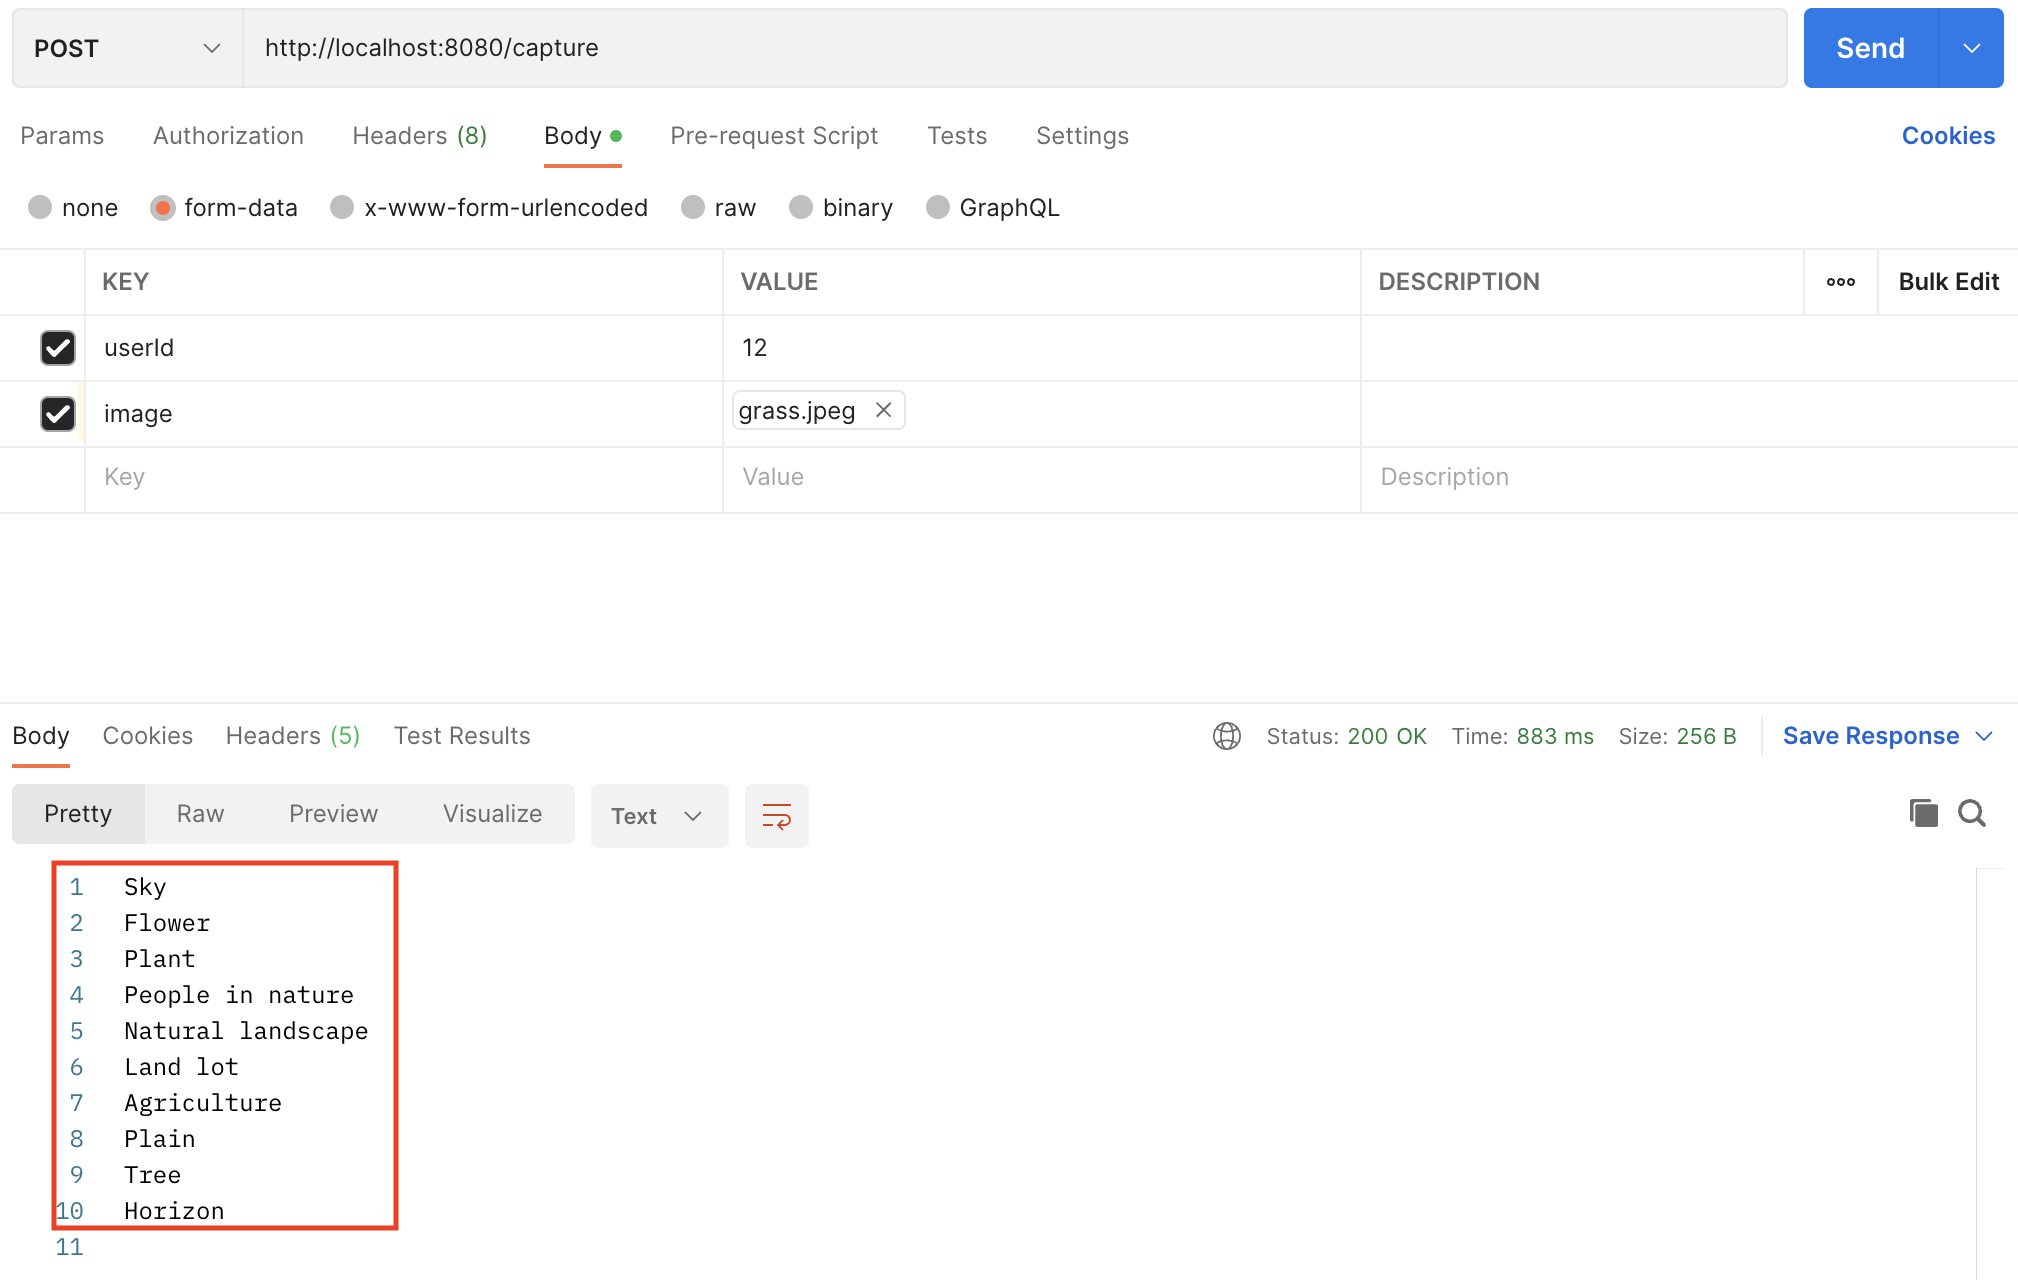
topicality- 적합성mid- annotation iddescription- 설명score- 신뢰도 점수
사진이 단순한 경우에는 description들의 의미가 유사하다.
test02
request

response
7. abstraction
Google Cloud와 통신, Vision API를 사용하는 데 사용되는 클래스들에 대한 설명
ImageAnnotatorClient
Google Cloud Vision API에 접속하는 클라이언트에 대한 abstraction이다.
Database connection 객체와 유사하다. 기능이 필요할 때에만 생성하고 완료되면 닫는다.
ImageAnnotatorClient.create())- ImageAnnotatorClient 생성.
AnnotateImageRequest
이미지 파일 한 개에 대한 요청.
이 객체를 List형태로 한 번에 여러 개의 파일에 대한 요청을 보낼 수 있다.
요청은 builder 패턴으로 생성하며 다음과 같은 값을 넣어야 한다.
Feature- Google Cloud에 요청할 기능의 종류Feature feat = Feature.newBuilder().setType(Feature.Type.LABEL_DETECTION).build();Image- Google Gloud Vision이 처리할 이미지Image img = Image.newBuilder().setContent(imgBytes).build();
BatchAnnotateImagesResponse
요청 리스트에 대한 응답이다. getResponseList() 메서드를 사용해 List형태의 AnnotateImageResponse를 추출할 수 있다.
AnnotateImageResponse
이미지 파일 한 개에 대한 응답.
getLabelAnnotationList() 메서드를 호출하여 List<EntityAnnotation> 객체를 얻을 수 있다.
EntityAnnotation
네 개의 field를 가지며 getLabelAnnotationList() 메서드는 모든 field를 Map 형태로 반환한다.
topicalitymiddescriptionscore

Comments